Building a Fiberglass Dinghy or Two
The LayUp of Boat #1
These dinghys are the largest layups I have done and learned a few things that are not written anywhere that I could find.
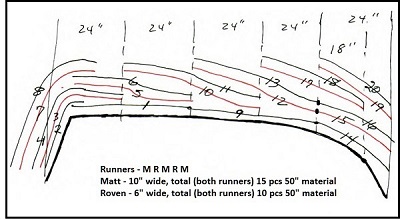
This is your layup schedule. When you are working with this many pieces you need to have a drawing like this so all goes as planned. When I did these I also had one other rule. No Talking except what is related to specifically what we were doing. If you are doing it where others can stop by and watch the first thing I said was no talking. I did have a friend show up that was going to help and just telling him what to do, I screwed up on the schedule. To much at stake.
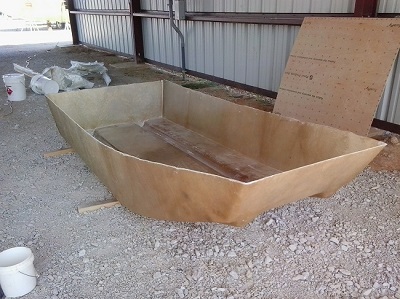
So, on this I was using 50 inch wide material, 1 1/2 ounce Matt and 18 ounce Roven. Matt / Roven / Matt / Roven / Matt. The hull is 1/8 thick and the runners are 1/4 inch thick. Measure your lengths with some extra as you can see in the top photo. Mark off your drawing to reflect the width of the material (50 inches in this case). By doing it sideways where the pieces are going across the boat instead of lengthwise it is easier to keep a wet edge. A wet edge is where you are always glassing to a piece that has not set yet.
Notice how the pieces overlap in the drawing. I actually used a marking pen to mark the mold where the pieces started and stopped. I wanted the runners to be twice as thick as the hull so I did them first and they probably were set when we got back to the bow. Just know how you are going to do each piece before starting. One friend of mine that was very experienced at fiberglassing said that when you are ready to start, stop and take time to go over it one last time.
I use polyester resin because that is all I have ever used and am pretty confident using it. Seems like most everyone else in the boatyard was using epoxy but for that amount needed epoxy can become quite expensive. Your choice but for a project like this polyester is quite sufficient. If you are doing gasoline tanks you should use vinylester.
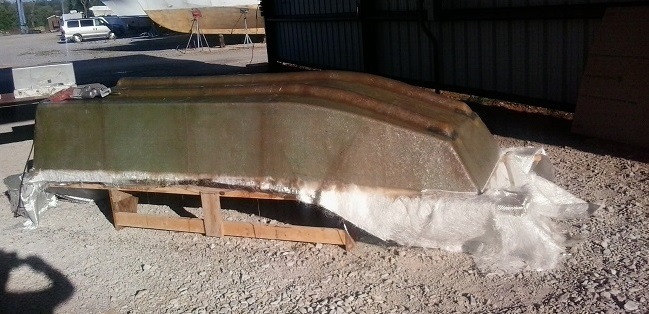
When you are ready to fiberglass, the plug needs to be prepared. For the first layer of wax I used Mop and Glo. Any kind of wax works. When that was dry I painted on two coats of Partial. This could have been sprayed also. Either way you are going to have to destroy the plug to get it out because as the fiberglass sets it shrinks and tightens on the plug. That is why you just hashed the plug together.
Mixing the resin and cataylst. Check it out online. You will find it says 38 cc's catalyst per gallon of resin for a temperature of 70 to 80F. That is what we did on fiberglassing over the plug and it was way too hot, we could not keep up with it. On the second layup we cut the cataylst in half (20cc's per gallon). On both the temperature was in the upper 70's.
Use good chemical resistance LATEX gloves and a respirator that filters out fumes.
My wife and I did the layups of the hulls, I wetted out where the piece was to go, both of us layed out the material so it layed flat and so the bubbles could be rolled out. Then I wetted out the material and she rolled the bubbles.
For this job we used a 4 1/2 inch roller (buy 9 inch rollers and cut them in half) with a 3/8 inch nap for wetting out. The real cheap rollers have a plastic core that will dissolve in the resin and try to slip off the rack. A 6 inch aluminum roller 1/2 inch in diameter was used for rolling the bubbles out. At times things just do not roll out, just add some resin to help it along.
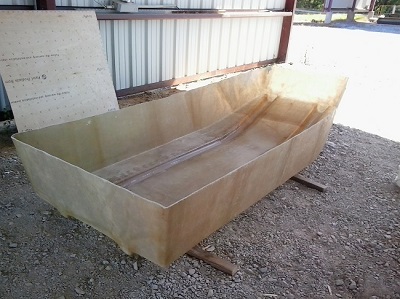
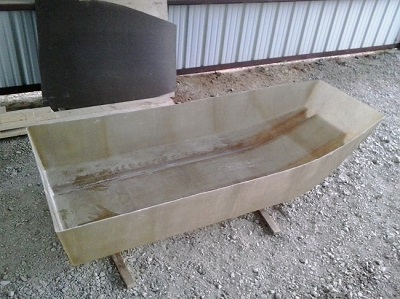
When the plug is removed and boat set rightside up, be sure and support it so the top of the bow and top of stern are parallel. If it is not it could take a set and always be crooked. A lot of work for a bad job.
This is your layup schedule. When you are working with this many pieces you need to have a drawing like this so all goes as planned. When I did these I also had one other rule. No Talking except what is related to specifically what we were doing. If you are doing it where others can stop by and watch the first thing I said was no talking. I did have a friend show up that was going to help and just telling him what to do, I screwed up on the schedule. To much at stake.
So, on this I was using 50 inch wide material, 1 1/2 ounce Matt and 18 ounce Roven. Matt / Roven / Matt / Roven / Matt. The hull is 1/8 thick and the runners are 1/4 inch thick. Measure your lengths with some extra as you can see in the top photo. Mark off your drawing to reflect the width of the material (50 inches in this case). By doing it sideways where the pieces are going across the boat instead of lengthwise it is easier to keep a wet edge. A wet edge is where you are always glassing to a piece that has not set yet.
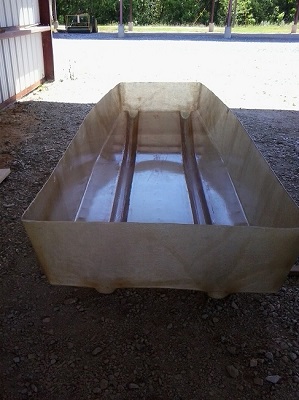
Notice how the pieces overlap in the drawing. I actually used a marking pen to mark the mold where the pieces started and stopped. I wanted the runners to be twice as thick as the hull so I did them first and they probably were set when we got back to the bow. Just know how you are going to do each piece before starting. One friend of mine that was very experienced at fiberglassing said that when you are ready to start, stop and take time to go over it one last time.
I use polyester resin because that is all I have ever used and am pretty confident using it. Seems like most everyone else in the boatyard was using epoxy but for that amount needed epoxy can become quite expensive. Your choice but for a project like this polyester is quite sufficient. If you are doing gasoline tanks you should use vinylester.
When you are ready to fiberglass, the plug needs to be prepared. For the first layer of wax I used Mop and Glo. Any kind of wax works. When that was dry I painted on two coats of Partial. This could have been sprayed also. Either way you are going to have to destroy the plug to get it out because as the fiberglass sets it shrinks and tightens on the plug. That is why you just hashed the plug together.
Mixing the resin and cataylst. Check it out online. You will find it says 38 cc's catalyst per gallon of resin for a temperature of 70 to 80F. That is what we did on fiberglassing over the plug and it was way too hot, we could not keep up with it. On the second layup we cut the cataylst in half (20cc's per gallon). On both the temperature was in the upper 70's.
Use good chemical resistance LATEX gloves and a respirator that filters out fumes.
My wife and I did the layups of the hulls, I wetted out where the piece was to go, both of us layed out the material so it layed flat and so the bubbles could be rolled out. Then I wetted out the material and she rolled the bubbles.
For this job we used a 4 1/2 inch roller (buy 9 inch rollers and cut them in half) with a 3/8 inch nap for wetting out. The real cheap rollers have a plastic core that will dissolve in the resin and try to slip off the rack. A 6 inch aluminum roller 1/2 inch in diameter was used for rolling the bubbles out. At times things just do not roll out, just add some resin to help it along.
When the plug is removed and boat set rightside up, be sure and support it so the top of the bow and top of stern are parallel. If it is not it could take a set and always be crooked. A lot of work for a bad job.