Building a Fiberglass Dinghy or Two
The "Plug"
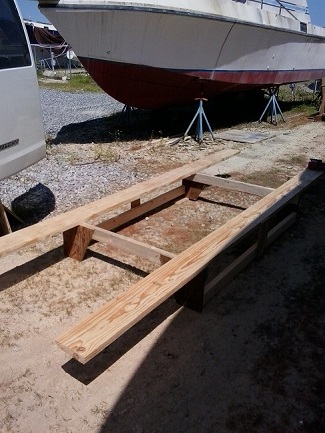
First step is to build a base frame. Remember, the plug
is only the 'shape' of the boat, it will not be a useable
boat when it is complete. Put the frame and plug
together with sheet rock screws, just the regular ones
because once the layup is complete the plug and frame
will be torn apart getting it out of the boat. (Since
fiberglass shrinks as it sets, I found it easier to just
plan on taking the plug out of the boat in pieces.)
As you are putting the screws in some may be where they
can be removed while taking apart the plug.
I bought the 2 x 8's when they were flat but they
warped so I used a brace to straighten them out and to
help make the frame more sturdy. The brace is the
vertical board on the side.
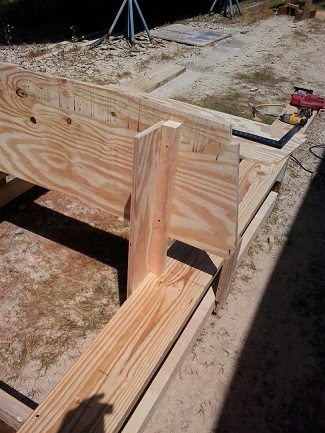
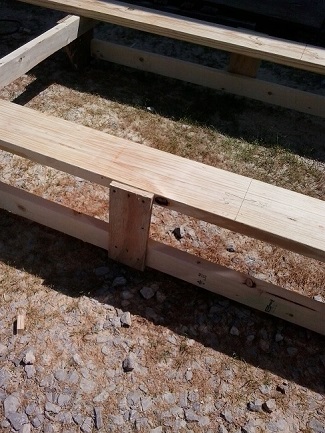
Set the center piece. This is to just hold the shape.
Make it sturdy. Here is one place you will be able to
remove some of the screws when removing the plug.
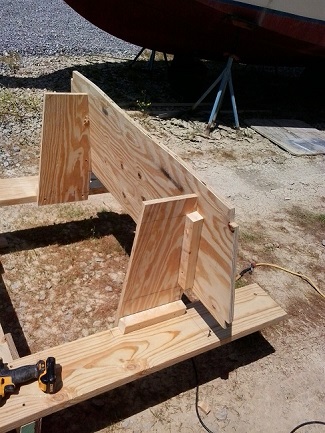
Set the transom piece. Generally for an outboard this is
set at 15 degrees and the sides at 10 degrees. The sides
can be anything you want where as the transom is pretty
much a fixed design parameter for an outboard motor.

The bow is set as per your plan. Once those pieces are
set, bend your bottom and screw it on. Notice the extra
support for the bottom between the bow and the center
piece. Just seemed like it could use a little more support
there.
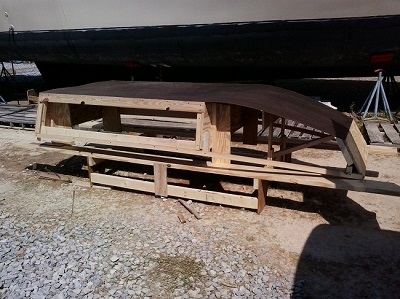
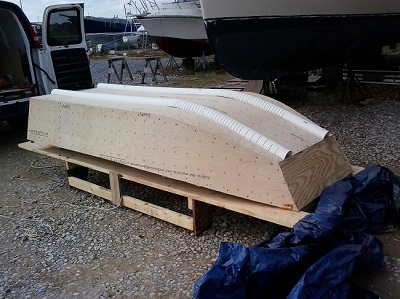
Finish the bottom and frame up the sides. For the gunnel
wrap a board around to the bow. This should be two
pieces about 3/8 thick and do not put a screw at the
center bulkhead or the curved board may break there.
Hardboard although it easy to bend is very temperature
sensitive and buckled up so switched to a decent quality
plywood.
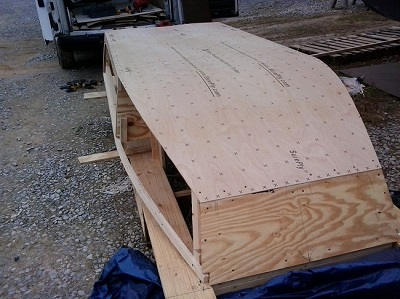
I like lots of screws just to hold the plywood in place.
The gunnel is one long piece bent to the bow. The chine
is more of a compound curve so blocks were screwed onto
the bottom every six inches and the sides screwed to the
blocks.
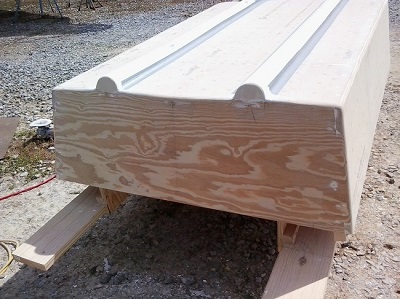
My design called for runners on the bottom for sitting on
the beach. They are made from 4 inch pvc pipe and for
making the curve there are slots cut an inch apart. To
attach them there are long screws thru the pipe into the
bottom. Countersink the pipe so the screw heads will not
stick up.
I used plaster of paris to make the cove along the edge
of the pipe, which was a mistake. The pipe was not stable
enough and the plaster of paris cracked and broke out.
There are two options I would try the next time. Option
one - use fiberglass putty (polyester resin and cabasil or
some kind filler) Wipe the pvc with acetone and the
putty will stick to it enough to make a boat. Option 2 -
drill small holes in the pipe after it is attached to the
bottom and fill it with expanding foam in aerosol cans.
The pipe may then be stable enough to use the plaster of
paris.
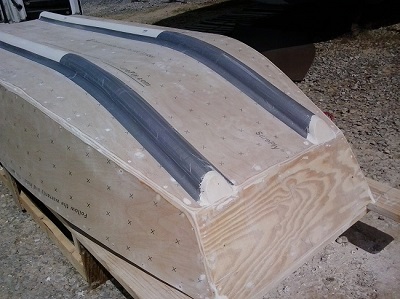
To cover the slots I used duct tape. Oil base paint and
duct tape do not mix so I replaced the duct tape with 2
inch masking tape.
There is tape on all of the coves along side of the pipe to
hold the plaster of paris until the layups are complete.
The ends of the pipes are filled with expanding foam then
plaster of paris to smooth it out.
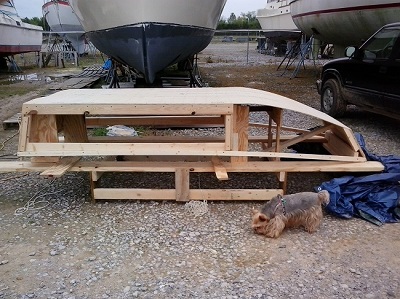
At this point there can be a lot of filling and sanding to
make the perfect boat, depending on how smooth you
want it to be.
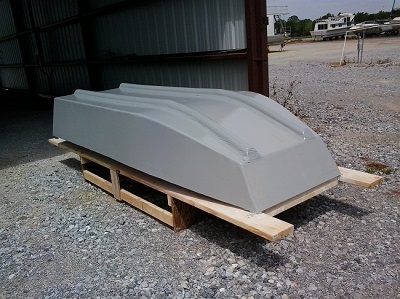
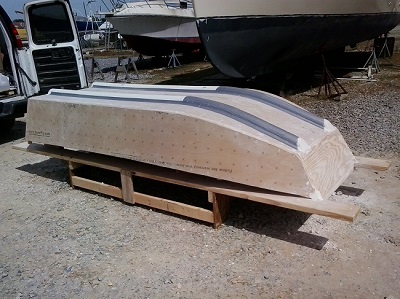
Since this is a one time only plug, use a decent oil base
gloss paint. Three coats gives a good gloss. This is just
an oil based porch and deck paint from Lowes.
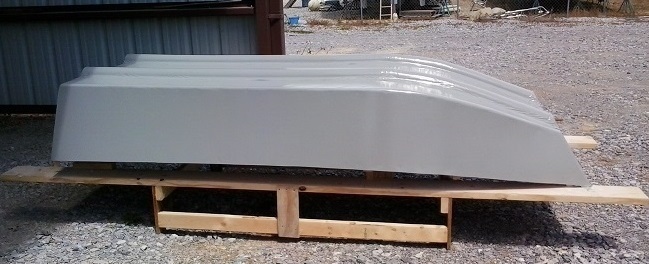
Plug Ready for waxing and Partial